

 Tweet
Tweet
Refurbed the starter today. Yes, it was bl00dy cold and yes, hands came in for a bit of a scuffing but it spins like a very spinny thing now  Thought I'd photograph it to take away a bit of the fear and mystery, and give people the option of doing it themselves for ~�40 rather than paying a garage ~�150
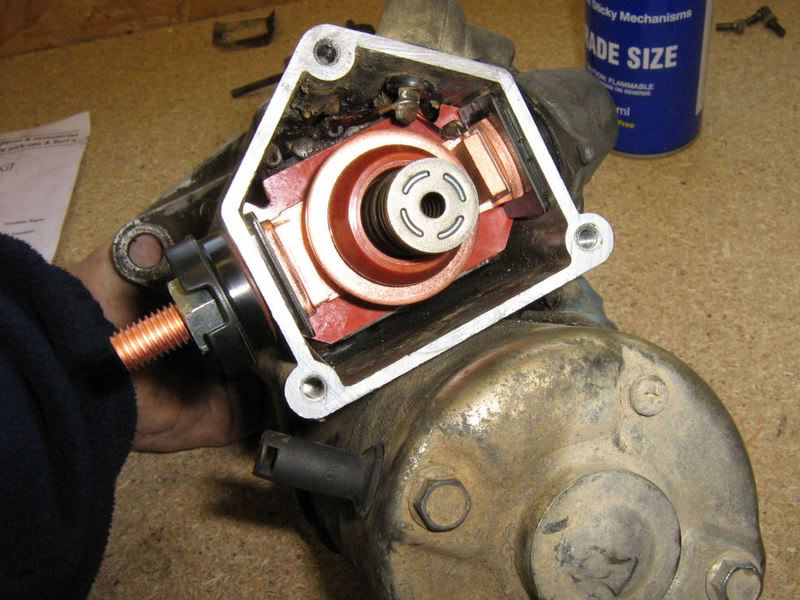
Here's the service kit from Roughtrax - which apparently will fix nearly all starter woes (and I believe that, having done this job twice now)
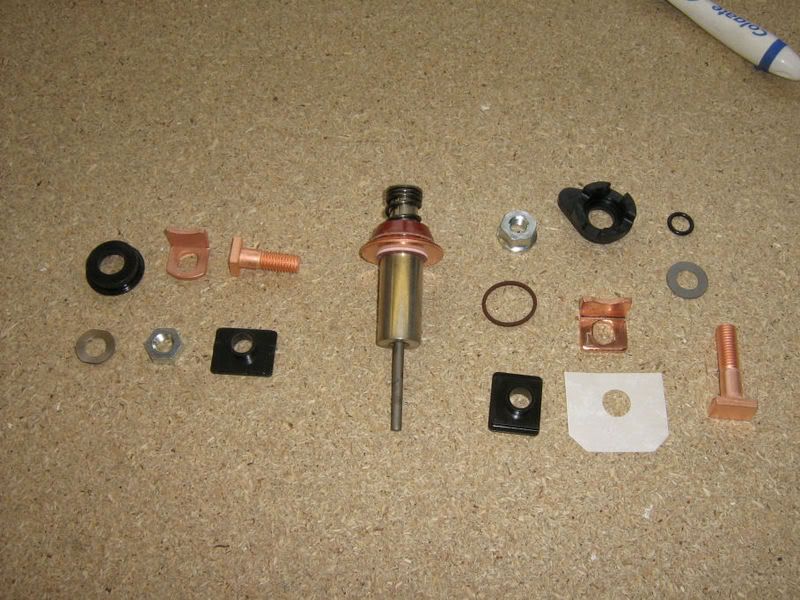
The kit will replace the fixed solenoid contacts, and the moving plunger contact, and the associated insulators / fixings etc.
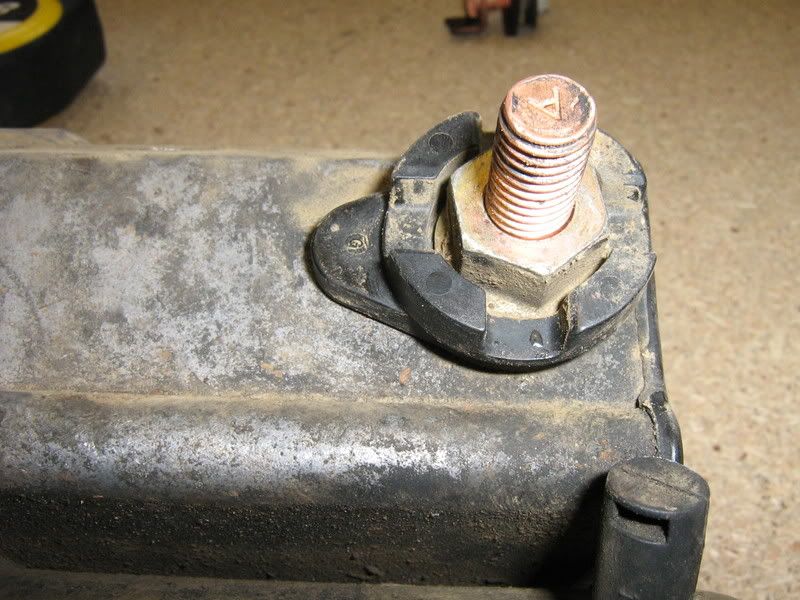
Start the job by disconnecting the positive leads from both batteries. DO NOT skip this step!
Then, as the starter wont come out from the bottom due to torsion bar / various bits of chassis being in the way, you need to remove a few bits from above. Mainly, this is the fuel filter housing. Dont bother disconnecting pipework, its not necessary as there is enough pipework to allow the assembly to sit on the inner wing by the airbox. I also removed the upper part of the ATF dipstick assembly, and a few hose clamps near the bottom of the oil filter. Again, this takes 2 minues and will save you loads of cursing later
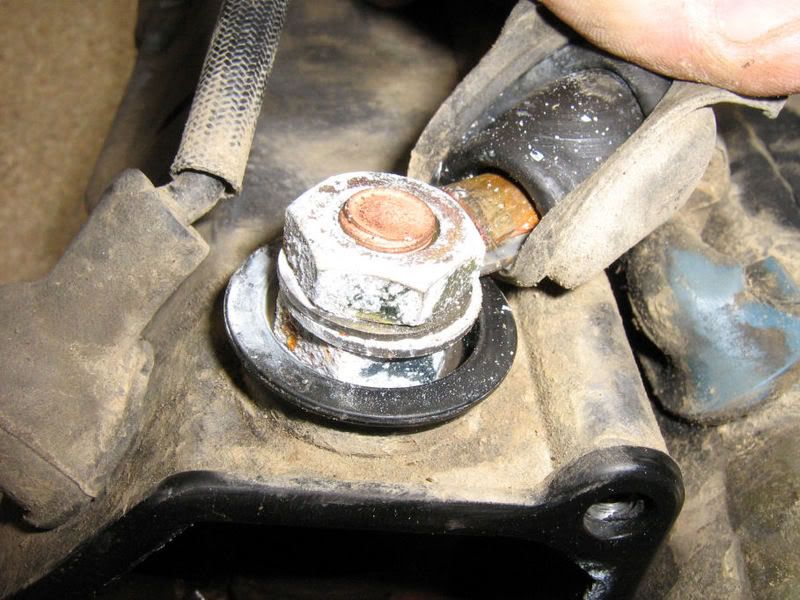
Now, working through the wheelarch, undo the main feed to the starter (17mm spanner) and the small solenoid actuator cable at the plastic inline connector just behind the starter.
You should then, after a bit of jiggling, be able to lift the starter out through the top of the engine bay.
Now take it somewhere warm! (my hands were numb, and slightly bl00dy by now!)
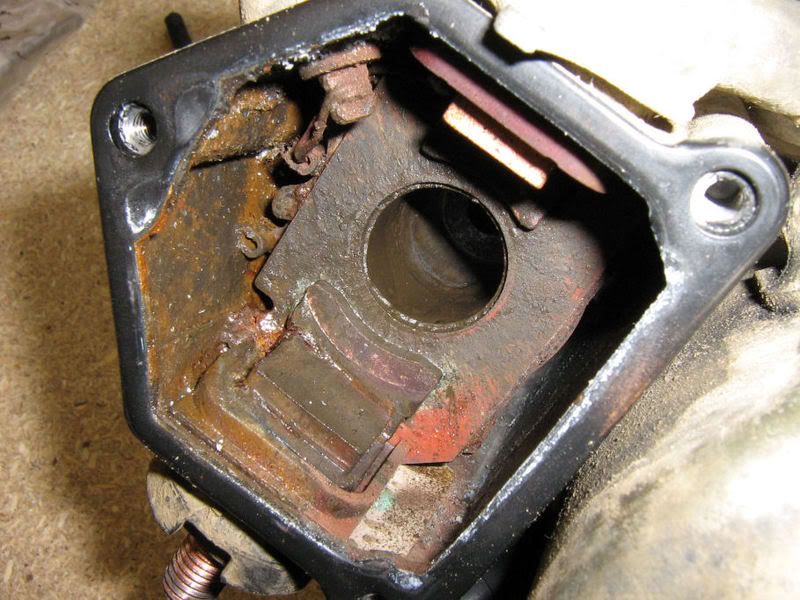
Take the back of the solenoid assembly - 3 x 8mm screws - and remove the seal for cleaning. Lift out the plunger. Mine looked like this - which is bad.
Here's the old plunger next to the new one. No prizes etc...
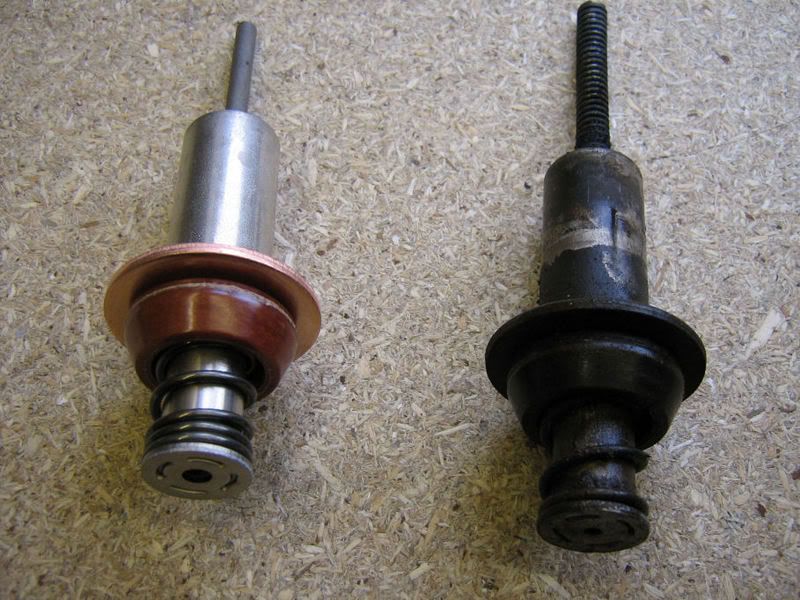
OK, so this is pretty bad - but it has been subject to pretty long periods under water this year!
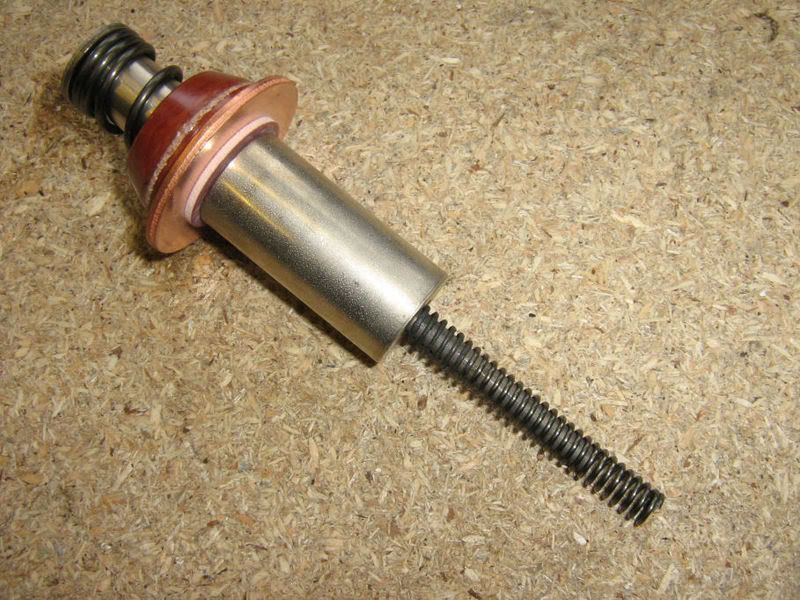
Clean up the spring off the old plunger as there isn't one in the repair kit (not that you should need one) and fit it to the new plunger - ahhh, thats better!
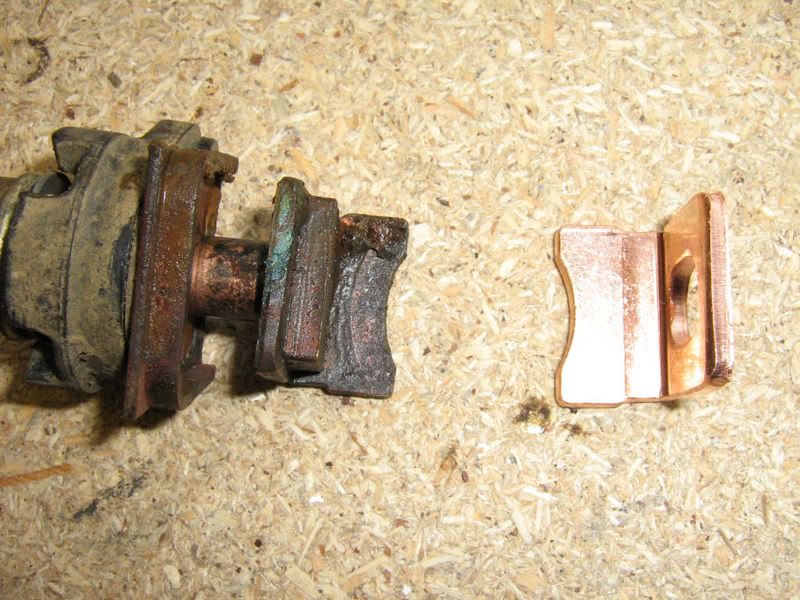
Now, remove the contact assemblies (17mm spanner again). They are different, and come in different bags in the roughtrax kit.
Here's the one that connects externally
Here's the one that connects across to the starter motor before being replaced
I re-assemble them so its easy to remember how the bits go together again, though there are pics with the kit. Here's an old assembly next to a new contact.
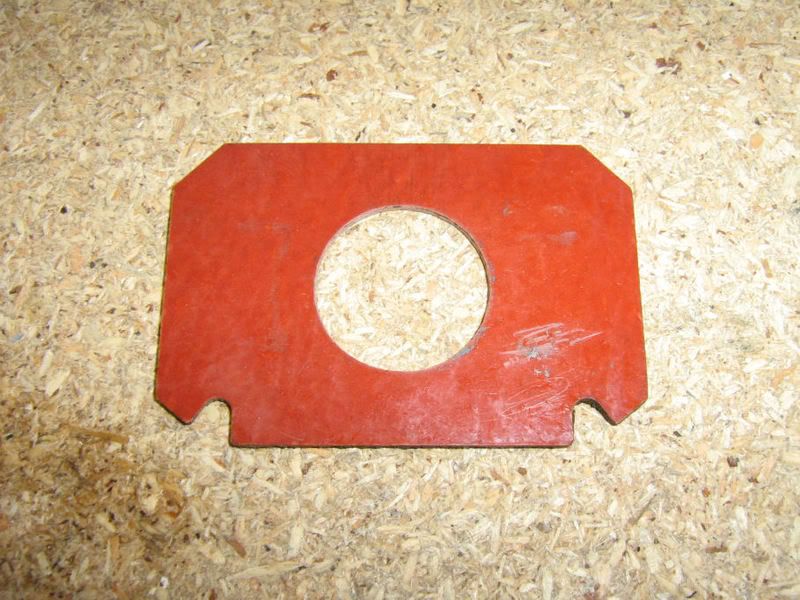
Lift out the reddish brown paxolin insulator plate (well, mine was muddy and black) and give it a clean up, and generally give the exposed internals a bit of a wipe round.
Here's my nice clean plate ready to go back.
Fit the new contacts referring to the pics, and the ones you just took out, and slide the new plunger into the hole, having cleaned out said hole first. MAKE SURE there is no metal contact between the new contacts and the body of the starter - in other words, make sure you haven't missed an insulator, or assembled anything wrong, or you will be in a world of pain, smoke and flames when you re-connect your batteries.
Thats better!
Re-fit the cleaned up seal, and the backplate and refit to the truck. Re-fitting is easier I found, and is just the reverse of removal.
When everything is replaced, and you are sure you haven't created any short circuits, re-connect the batteries and marvel how your wonderfully repaired started spins the engine up faster than it has in years!
Thought I'd photograph it to take away a bit of the fear and mystery, and give people the option of doing it themselves for ~�40 rather than paying a garage ~�150Here's the service kit from Roughtrax - which apparently will fix nearly all starter woes (and I believe that, having done this job twice now)
The kit will replace the fixed solenoid contacts, and the moving plunger contact, and the associated insulators / fixings etc.
Start the job by disconnecting the positive leads from both batteries. DO NOT skip this step!
Then, as the starter wont come out from the bottom due to torsion bar / various bits of chassis being in the way, you need to remove a few bits from above. Mainly, this is the fuel filter housing. Dont bother disconnecting pipework, its not necessary as there is enough pipework to allow the assembly to sit on the inner wing by the airbox. I also removed the upper part of the ATF dipstick assembly, and a few hose clamps near the bottom of the oil filter. Again, this takes 2 minues and will save you loads of cursing later
Now, working through the wheelarch, undo the main feed to the starter (17mm spanner) and the small solenoid actuator cable at the plastic inline connector just behind the starter.
You should then, after a bit of jiggling, be able to lift the starter out through the top of the engine bay.
Now take it somewhere warm! (my hands were numb, and slightly bl00dy by now!)
Take the back of the solenoid assembly - 3 x 8mm screws - and remove the seal for cleaning. Lift out the plunger. Mine looked like this - which is bad.
Here's the old plunger next to the new one. No prizes etc...
OK, so this is pretty bad - but it has been subject to pretty long periods under water this year!
Clean up the spring off the old plunger as there isn't one in the repair kit (not that you should need one) and fit it to the new plunger - ahhh, thats better!
Now, remove the contact assemblies (17mm spanner again). They are different, and come in different bags in the roughtrax kit.
Here's the one that connects externally
Here's the one that connects across to the starter motor before being replaced
I re-assemble them so its easy to remember how the bits go together again, though there are pics with the kit. Here's an old assembly next to a new contact.
Lift out the reddish brown paxolin insulator plate (well, mine was muddy and black) and give it a clean up, and generally give the exposed internals a bit of a wipe round.
Here's my nice clean plate ready to go back.
Fit the new contacts referring to the pics, and the ones you just took out, and slide the new plunger into the hole, having cleaned out said hole first. MAKE SURE there is no metal contact between the new contacts and the body of the starter - in other words, make sure you haven't missed an insulator, or assembled anything wrong, or you will be in a world of pain, smoke and flames when you re-connect your batteries.
Thats better!
Re-fit the cleaned up seal, and the backplate and refit to the truck. Re-fitting is easier I found, and is just the reverse of removal.
When everything is replaced, and you are sure you haven't created any short circuits, re-connect the batteries and marvel how your wonderfully repaired started spins the engine up faster than it has in years!


 disco now gone aswell

Comment